
How to Stop Condensation and Black Mold Around Windows — Safe Removal and Prevention
Window condensation and black mold keep returning? Find the cause, clean a small patch safely, reduce indoor humidity, fix leaks and learn when to call a professional.
Contents
- First, find out where the window moisture is coming from
- Condensation on the room-facing glass
- Condensation trapped between panes
- Leaks and building defects
- Why black mold grows around window frames and sills
- Step-by-step: remove a small, accessible patch safely
- Before you start: stop and get help in these situations
- A safe cleanup routine for hard surfaces
- Should you use bleach, vinegar or a dedicated mold spray?
- What if the mold is in the silicone seal?
- How to stop condensation coming back: an achievable daily plan
- 1. Measure relative humidity rather than guessing
- 2. Extract moisture at the source
- 3. Ventilate without leaving your windows open all day
- 4. Keep cold frames and corners from remaining wet
- 5. Consider a dehumidifier when ventilation is not enough
- 6. Change laundry and furniture placement
- Troubleshooting: condensation keeps returning despite your efforts
- When to call a professional rather than attempting DIY
- Renting in the UK: document the problem and report it
- England social housing: what Awaab’s Law covers
- Renting in the US or elsewhere in Europe
- Seven-day action plan to check whether your fix is working
- Mistakes that make window mold worse
- What the science says about preventing recurrence
- Official guidance and further reading
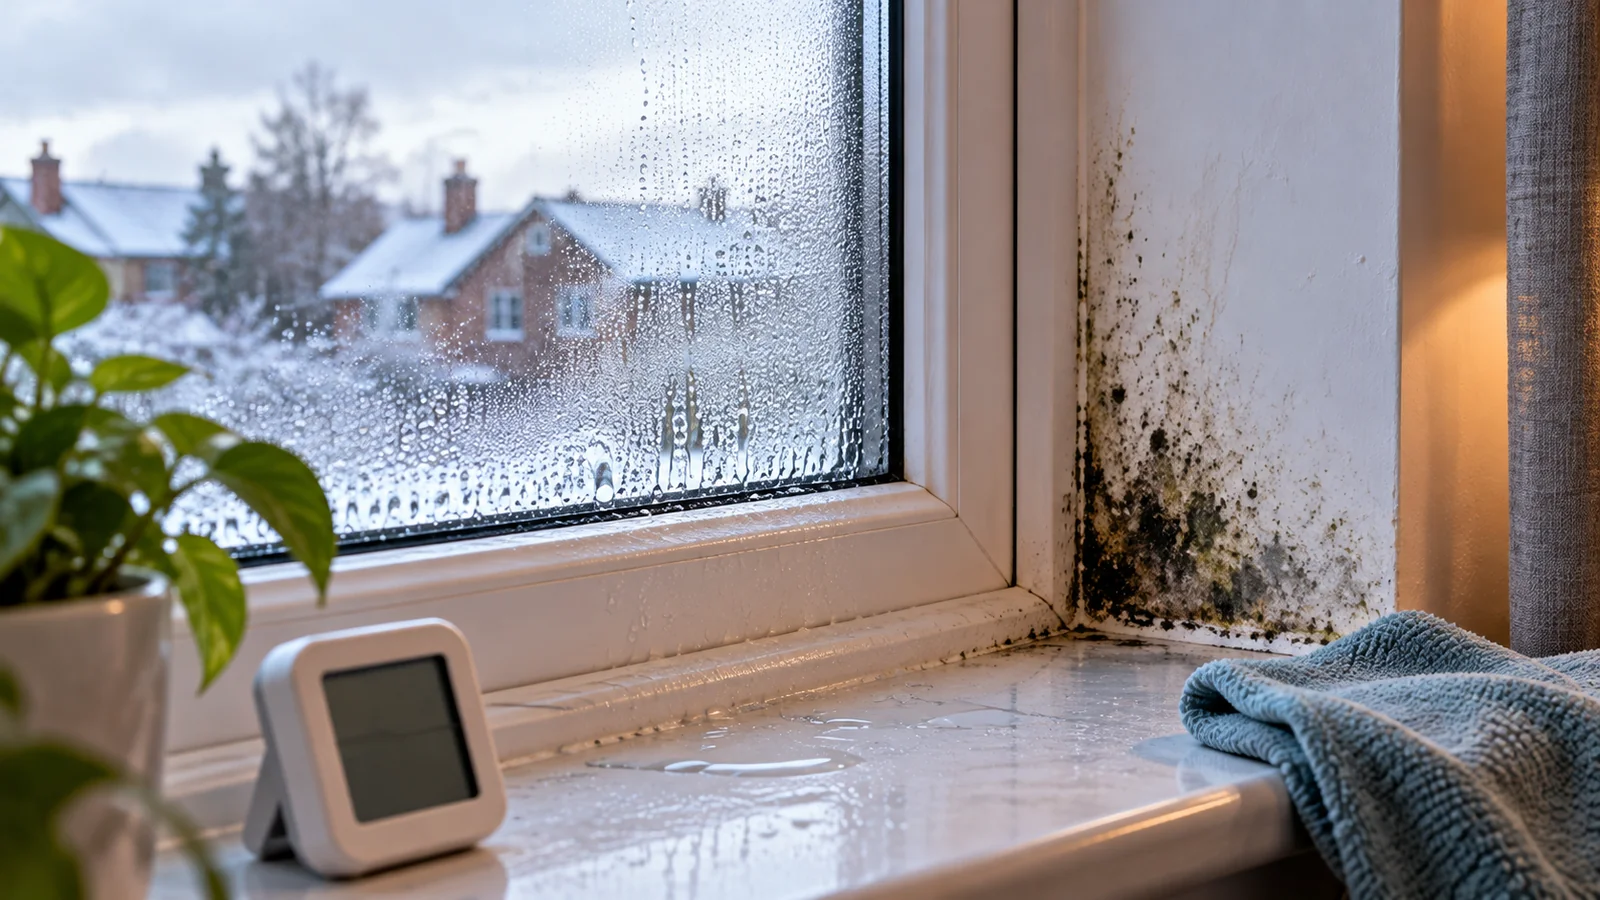
You wipe the water off your bedroom window in the morning, only to find it dripping again the next day. Then small dark spots appear along the silicone seal, painted reveal, or sill. Is it harmless winter condensation, a leaking window, or a sign that something inside the wall needs fixing? The right answer matters because cleaning visible mold is only one part of solving the problem.
This practical guide explains how to distinguish common types of window moisture, safely deal with a small surface patch, lower indoor humidity without making a home uncomfortably cold, and recognise the point at which a homeowner, landlord, glazing specialist, or mold-remediation contractor should take over. It applies broadly to homes in the UK, continental Europe, and the United States, while building rules and tenant rights vary by jurisdiction.
Important: If there is substantial growth, hidden damp, sewage or floodwater contamination, or someone in the home has asthma, chronic lung disease, significant allergies, or a weakened immune system, do not treat the problem as a routine DIY cleaning job. Follow the safety guidance from the US Centers for Disease Control and Prevention (CDC) and consider qualified help.
First, find out where the window moisture is coming from
A window can be wet for three very different reasons. You may have condensation on the interior surface, a failed seal between panes, or a water leak from outside. Treating all three as “too much humidity” can waste money and allow hidden deterioration to continue.
| Where you see water | Most likely explanation | What to do first |
|---|---|---|
| Inside surface of glass, mainly on cold mornings | Warm indoor air condensing against cold glass | Wipe dry; measure indoor humidity; improve extraction and ventilation |
| Between the two sealed panes of double glazing | Insulated-glass unit seal may have failed | Ask a glazing professional to inspect; indoor wiping cannot clear trapped moisture |
| Outside surface of the glass | Outdoor dew on efficient cold outer pane | Usually normal; it may clear as outdoor conditions change |
| Around frame after heavy rain, or from above window | Possibly failed exterior flashing, sealant, roof or wall defect | Photograph the pattern; request an inspection and repair |
| On nearby plaster, wallpaper or behind furniture | Condensation on a thermal bridge, a leak or concealed damp | Check cold surfaces, airflow and leaks; involve a professional if persistent |
Condensation on the room-facing glass
Air contains water vapour. When that air meets a surface cold enough to fall below its dew-point temperature, water can settle on the surface as droplets. In winter, windows and adjacent frame corners are often cooler than the rest of the room, so the moisture becomes visible there first. The US Environmental Protection Agency (EPA) explains this relationship between temperature, water vapour and window condensation.
For example, a bedroom may feel comfortably warm while the edge of the glazing remains much colder. Two people breathing through the night, a closed door, wet laundry and an unventilated en-suite can increase moisture, making a cold corner damp before the central part of the glass.
Condensation trapped between panes
If mist or droplets are visibly inside the sealed airspace of a double- or triple-glazed unit and cannot be reached from either side, ventilation and a dehumidifier will not repair the seal. A glazier can assess whether the insulated glazing unit needs replacement. This is different from condensation that you can wipe off the indoor face.
Leaks and building defects
Damp that follows rainfall, tracks down the wall, stains plaster, swells timber, or occurs in only one side of the frame may involve rain penetration or a building defect rather than everyday condensation. Failed window flashing, decayed seals, cracks, obstructed drainage channels, or poorly insulated reveals all warrant inspection. UK government guidance explicitly asks housing providers to investigate building deficiencies rather than assuming occupants caused the problem: read the guidance.
Why black mold grows around window frames and sills
Mold spores are widely present in indoor and outdoor air. They can grow when persistent moisture reaches dust, paint, paper-faced plasterboard, wooden trims, or organic debris trapped along a window seal. The glass itself is not food, but grime on and beside the glass can support growth when constantly wet. A few dark spots near cold corners can be a sign of repeated moisture, not simply a cleaning failure.
- Cold surfaces: single glazing, metal frames and poorly insulated reveals reach dew point sooner.
- Too much moisture: bathing, cooking, humidifiers, drying laundry indoors, and poorly vented clothes dryers add water vapour.
- Insufficient extraction: non-working fans, blocked vents or fans exhausting into a loft instead of outdoors trap humidity.
- Limited air movement: deep blinds, heavy curtains and tightly packed furniture can leave frame edges cold and damp.
- Leaks and defects: damaged sealant, missing flashing, penetrating rain or a plumbing leak can keep materials damp regardless of the humidity reading.
The CDC notes that mold color does not by itself tell you whether it is more or less dangerous. “Black mold” is a description of how a patch looks, not a reliable diagnosis of a particular species. Treat any visible indoor mold and underlying moisture as something to address, rather than trying to identify its type by sight. See CDC: Mold, Testing, and Remediation.
Step-by-step: remove a small, accessible patch safely
For a limited area of surface growth on hard, non-porous materials, a careful DIY clean may be reasonable if there has not been significant water damage and the person cleaning is not medically vulnerable. The EPA says areas smaller than approximately 10 square feet (0.9 m²) can usually be addressed by householders, depending on the circumstances. That figure is a broad screening guide, not a guarantee that every smaller problem is safe.
Before you start: stop and get help in these situations
- The visible area is large, is spreading inside drywall/plasterboard or insulation, or returns immediately after cleaning.
- There is a strong musty smell with little visible growth, suggesting possible hidden mold.
- The area was affected by sewage, floodwater or major leakage, or electrical fittings have become wet.
- The cleaner has asthma, COPD, significant allergies, immune suppression, or an underlying lung condition.
- You are a tenant and the damp may be linked to a structural defect; document it and notify the landlord or building manager before disturbing the surface.
A safe cleanup routine for hard surfaces
- Photograph the issue. Record where and when moisture appears, including rainfall and indoor humidity readings. This helps find the root cause and documents problems in rented housing.
- Keep vulnerable people and pets away. Wear protective gloves, splash-resistant goggles, and a well-fitting respirator suitable for mold cleanup; US CDC guidance recommends at least an N95 respirator. Open a window when safe to improve air exchange.
- Do not dry-brush or vacuum loose mold with an ordinary vacuum. Avoid actions that unnecessarily disperse particles, and do not point a household fan directly at a moldy surface.
- Gently clean the hard, non-porous area. Use water and a small amount of ordinary detergent as directed by the EPA; wipe or scrub carefully rather than aggressively scraping or sanding.
- Remove residue and dry completely. Use clean cloths to collect moisture, bag disposable cleaning materials and dry the sill/frame. Keep the room appropriately ventilated.
- Inspect the caulk and adjacent materials. If growth is embedded in silicone or porous trim, wiping may not remove it; replacement after correcting the moisture source can be necessary.
- Check again after several days. If moisture and mold return, investigate cold bridges, ventilation, glazing seals or leaks rather than repeating cleaner applications indefinitely.
The EPA household cleanup guide recommends scrubbing mold off hard surfaces with detergent and water and drying completely. It also warns that porous materials may need replacement and that painting or caulking over mold before cleaning and drying will not solve the problem.
Should you use bleach, vinegar or a dedicated mold spray?
Bleach is not the EPA’s routine recommendation for mold removal. Merely killing mold is insufficient because dead mold material can still trigger reactions. Use the surface-cleaning method appropriate for the material and, if choosing a specialist product, follow its label and ventilate. Never mix bleach with ammonia, acids, vinegar, or other cleaning chemicals; dangerous fumes can result. The guidance is at EPA: Should I use bleach?.
Vinegar, baking soda and internet “miracle mixtures” cannot substitute for fixing a failed seal, a wet wall or a moisture problem. Chemical cleaners can also damage some coatings and glazing components, so check the window manufacturer’s advice. Do not spray chemicals into electric blind motors, sockets or other electrical equipment.
What if the mold is in the silicone seal?
If discoloration is only on the surface, gentle cleaning may help. If staining is deeply embedded or the sealant has separated, deteriorated or stayed wet behind it, the right solution may be to remove and replace the affected sealant after inspecting and correcting moisture entry. Reapplying silicone over damp or moldy material can trap the problem instead of solving it. Use a qualified tradesperson if the joint is part of an exterior waterproofing system or its role is unclear.
How to stop condensation coming back: an achievable daily plan
Think of prevention as three connected jobs: reduce moisture generated indoors, move moist air outdoors, and prevent glass and walls from becoming persistently cold. None works reliably if a leak remains unrepaired.
1. Measure relative humidity rather than guessing
A small digital hygrometer is a useful starting point. The EPA advises keeping indoor humidity below 60%, ideally about 30–50% relative humidity. But in very cold weather, even 50% can be too high for poorly insulated windows; moisture may condense unless the glass warms up or indoor humidity drops further. Avoid forcing the home excessively dry simply to reach a number.
Place the meter away from radiators, direct sunlight, open windows and steamy appliances. Observe the readings morning and evening and after showers or cooking. Compare rooms: a bedroom at 65% every morning points to a different issue from one brief humidity spike in a bathroom after a shower.
| Indoor RH reading | What it suggests | Possible next step |
|---|---|---|
| About 30–50% | Common useful target range for many homes | Maintain ventilation, adequate heating and moisture control |
| 50–60% | May still cause condensation on very cold window edges | Look for droplets and colder corners; improve extraction or reduce moisture sources |
| Consistently above 60% | Elevated moisture that can encourage mold | Investigate drying laundry, fans, humidifiers, leaks; consider dehumidification |
| Below about 30% | Can be uncomfortably dry for some occupants | Review heating, ventilation and any humidifier settings; avoid over-correction |
2. Extract moisture at the source
Use an extractor fan that actually vents to the outside during cooking and bathing, and allow it to run afterward according to the fan’s guidance. Cover saucepans, close the kitchen or bathroom door during heavy steam production when appropriate, and avoid venting a clothes dryer into a living space. The EPA moisture-control guidance and UK government guidance both emphasise targeted extraction.
3. Ventilate without leaving your windows open all day
Where it is safe and practical, use brief, effective ventilation to remove moist indoor air, especially after cooking, bathing or indoor laundry. In cold weather, a short window-opening period can be preferable to leaving a window slightly open for many hours if that excessively cools surrounding walls. Actual effectiveness depends on outdoor humidity, wind, building layout and ventilation design. Keep existing trickle vents clear and follow the property’s ventilation arrangements; never block required ventilation openings.
If outside air is smoky, severely polluted or affected by wildfire, or if it is unsafe to open a window, prioritise suitable mechanical ventilation and local public-health advice. Opening windows is not the answer in every outdoor condition.
4. Keep cold frames and corners from remaining wet
Wipe up water from glass and window sills promptly and safely, particularly first thing in the morning. Do not leave soaked cloths to dry in the same unventilated room. Ensure radiators and heating outlets are unobstructed, consider properly installed glazing improvements, and investigate cold spots around window reveals. Upgrading glazing can help, but it is not a substitute for dealing with indoor moisture.
5. Consider a dehumidifier when ventilation is not enough
A dehumidifier can be helpful in bedrooms, basements or homes where laundry must dry indoors. Choose a model suitable for the room temperature and size; empty or drain it safely, clean filters and water containers as directed, and check humidity rather than running it blindly. A unit may reduce airborne moisture, but it cannot fix rain coming through a frame or rot behind the wall.
6. Change laundry and furniture placement
Dry clothes outdoors or in a properly vented dryer when possible. When indoor drying is unavoidable, use a designated, ventilated area with a dehumidifier where suitable and avoid placing wet clothes by a cold bedroom window. Pull furniture and heavy curtains away from persistent damp or cold external-wall corners enough for air to circulate, without compromising fire safety or accessibility.
Troubleshooting: condensation keeps returning despite your efforts
| Symptom | Likely issue to investigate | Who or what can help |
|---|---|---|
| Only the bedroom window drips overnight | Overnight occupancy moisture and insufficient room ventilation | Track bedroom RH; check ventilation and heating |
| Wet around one corner after storms | Rain penetration, exterior seal or flashing | Window installer, roofer or building surveyor |
| Persistent fog between glass panes | Failed insulated glazing seal | Glazing specialist; possible replacement of glass unit |
| Black marks on plaster beside window | Cold bridge, damp substrate or leak | Assess insulation/ventilation; landlord or surveyor if recurring |
| Mold keeps returning through caulk | Moisture beneath or within deteriorating sealant | Inspect junction; replace only after addressing root cause |
| Humidity stays high with fans running | Fans not extracting to outdoors, undersized system, moisture source | Check ducting and airflow; HVAC or ventilation professional |
| Room smells musty but growth is hidden | Potential concealed moisture and mold | Specialist inspection; avoid opening wall cavities yourself |
A moisture meter or thermal camera can help an experienced professional find problem areas, but a thermal image alone does not identify mold or prove a leak. Likewise, purchasing a retail mold testing kit is rarely necessary when there is already visible growth: the action remains removal of the contamination and correction of moisture. The CDC guidance favours inspection of damp conditions and remediation over routine air sampling.
When to call a professional rather than attempting DIY
Get professional assessment for large growth, repeated substantial water intrusion, likely concealed damp, deteriorating plasterboard or timber, mold close to an HVAC intake, or contamination from flooding or sewage. The EPA’s rough 10-square-foot threshold is a screening point, not a rule that all smaller patches are harmless; the full situation determines whether DIY work is appropriate.
If someone at home develops breathing difficulties or has existing respiratory disease that worsens around damp areas, seek medical advice. People with weakened immune systems and underlying lung conditions should not clean mold themselves. The CDC outlines extra precautions and groups at higher risk. Seek urgent medical help for severe breathing difficulties.
Renting in the UK: document the problem and report it
If you rent, photograph the damp and mould before cleaning, note dates and which rooms are affected, and tell the landlord or letting agent in writing. Describe potential building defects as well as moisture, and keep copies of replies and repair requests. Do not assume mold around windows is automatically a tenant “lifestyle issue”: structural conditions, inadequate heating and ventilation systems, and leaks all require proper assessment.
England social housing: what Awaab’s Law covers
As of October 2026, Awaab’s Law applies to qualifying social housing in England. Official government guidance says emergency hazards require action within 24 hours, while significant damp and mould hazards must be investigated within 10 working days and made safe within 5 working days of the investigation. Detailed duties and exceptions depend on the nature of the hazard; a minor patch of condensation does not automatically meet the significant-hazard threshold. See government guidance for social tenants.
The UK government opened a consultation on 9 October 2026 on extending Awaab’s Law to private renting and certain licensed accommodation. That proposal should not be described as already in force for private rentals. Scotland, Wales and Northern Ireland have different systems; check local housing guidance and seek tenant advice specific to where the property is located.
Renting in the US or elsewhere in Europe
In the United States, landlord repair obligations and enforcement routes differ by state and city; contact the relevant local code-enforcement or housing department where persistent moisture appears linked to a defect. Across European countries, tenant rights and notification rules also vary. The practical sequence is broadly similar: document the growth, report it promptly, request investigation of underlying moisture, and follow local housing and health authority procedures.
Seven-day action plan to check whether your fix is working
- Day 1 — Diagnose: record photographs, check whether water is on, between or outside panes, and note any relationship to rain.
- Day 2 — Measure: place a hygrometer appropriately; record morning and evening humidity and condensation.
- Day 3 — Stop moisture at source: check bathroom and kitchen extraction, laundry drying, and humidifier settings.
- Day 4 — Clean safely: only if the patch is suitable for DIY and you are medically able; use PPE and appropriate detergent cleaning.
- Day 5 — Improve conditions: clear vents, adjust ventilation, manage indoor humidity and avoid persistent cold window edges.
- Day 6 — Inspect: revisit frame corners, sealant, plaster and drainage. Arrange a repair inspection for suspected leaks or failed glazing.
- Day 7 — Compare: review humidity measurements and photos; escalate if growth, damp, or a strong odour persists.
This is a monitoring and action checklist, not a promise that mold or a building defect can be resolved in seven days. If the wall is damp inside or a leak has affected structural materials, professional repairs and drying may take longer. Do not delay action on serious hazards to finish the checklist.
Mistakes that make window mold worse
- Cleaning without fixing the moisture: mold is likely to return.
- Painting over it: conceals symptoms and often causes peeling.
- Using strong chemical mixtures: unsafe combinations can create dangerous fumes.
- Ignoring moisture between panes: this points toward glazing performance rather than only room humidity.
- Leaving a window open continuously in freezing weather: may create new cold surfaces, cost more to heat and still fail to manage moisture efficiently.
- Assuming the color proves toxicity: visual appearance cannot identify a mold species or predict health effects.
- Blaming the household without checking defects: leaks, insulation, failed heating and inadequate extraction matter too.
What the science says about preventing recurrence
The consistent message across US and UK guidance is straightforward: water management comes first. Mold spores are ubiquitous, so attempting to sterilise a home is neither realistic nor necessary. Keep materials dry, repair leaks promptly, remove existing growth safely and address the conditions that allowed it to form. The EPA recommends drying wet building materials within 24–48 hours where possible following leaks or spills, because prolonged damp increases the risk of growth.
A healthy indoor environment involves balancing warmth, ventilation and humidity. More heating alone may raise surface temperatures but will not remove water released during cooking or bathing. Ventilation alone cannot mend a leaking window. A dehumidifier alone cannot replace a damaged wall. The best solution is the one matched to the actual cause.
Official guidance and further reading
- US EPA — Mold Cleanup in Your Home — small-area remediation, hard surfaces and professional help.
- US EPA — A Brief Guide to Mold, Moisture and Your Home — humidity and condensation prevention.
- US EPA — Should I Use Bleach to Clean Mold? — chemical safety.
- US CDC — Mold Clean Up Guidelines — personal protection and vulnerable groups.
- US CDC / NIOSH — Mold, Testing and Remediation — color, testing and source control.
- UK Government — Damp and Mould: Health Risks and Housing Guidance — investigation, ventilation and building defects.
- UK Government — Awaab’s Law: Social Housing Tenants — England social housing rights.
- UK Government — Consultation on Awaab’s Law for Private Tenancies — status of proposed extension as of October 2026.
You may also like
 Technology & How-To
USB Drive Empty but Space Used? Find the Missing Data Safely
Find why an accessible USB looks empty while space remains occupied, using visibility checks, Trash review and device-versus-volume…
 Technology & How-To
Windows 11 Clipboard History Not Working? Find What Failed
Separate Windows clipboard history failures from ordinary paste, app restrictions, cloud sync and Remote Desktop with a two-item…
 Technology & How-To
Chrome Keeps Reloading Tabs? Stop the Right Kind of Refresh
Find why Chrome tabs reload with targeted Memory Saver settings, controlled comparisons, extension checks and diagnostics that protect…