
How to Calculate Roof Area and Pitch: Formulas, Roof Squares, and Worked Examples
Learn to calculate sloped roof area using roof pitch, overhangs, and projected dimensions. Includes pitch factors, gable and complex-roof examples, roofing squares, and material planning.
Contents
- Roof area vs. house square footage: understand the difference
- What roof pitch means: rise, run, angle, and slope
- The three measurements that matter
- The roof area formula and why the pitch factor works
- Roof pitch multiplier chart: from 2:12 to 12:12
- Step-by-step: calculate the area of a simple gable roof
- Step 1: Establish the horizontal roof outline
- Step 2: Identify the roof pitch
- Step 3: Calculate actual sloped roof area
- Step 4: Convert the result into roofing squares
- Step 5: Apply material allowance separately
- How to measure roof pitch without unsafe roof access
- The overhang problem: what dimensions should you enter?
- Complex roofs: hips, valleys, dormers, and attached additions
- Divide the plan into roof sections
- Worked example: a roof with two different pitches
- Roof area calculation in meters and square meters
- Convert between square feet and square meters
- Estimating shingles, tiles, underlayment, and metal roofing
- Asphalt shingles: use the labeled bundle coverage
- Metal sheets: calculate useful coverage, not just raw width
- Tiles and slates: manufacturer coverage comes first
- Components that need their own quantities
- How much waste should be added to a roof estimate?
- Pitch also determines whether a roofing product is suitable
- Common mistakes that change the result
- How to compare roofing quotes using your calculation
- Use the Horus Valley Roofing Calculator
- A final checklist before ordering roofing materials
- Sources and technical references
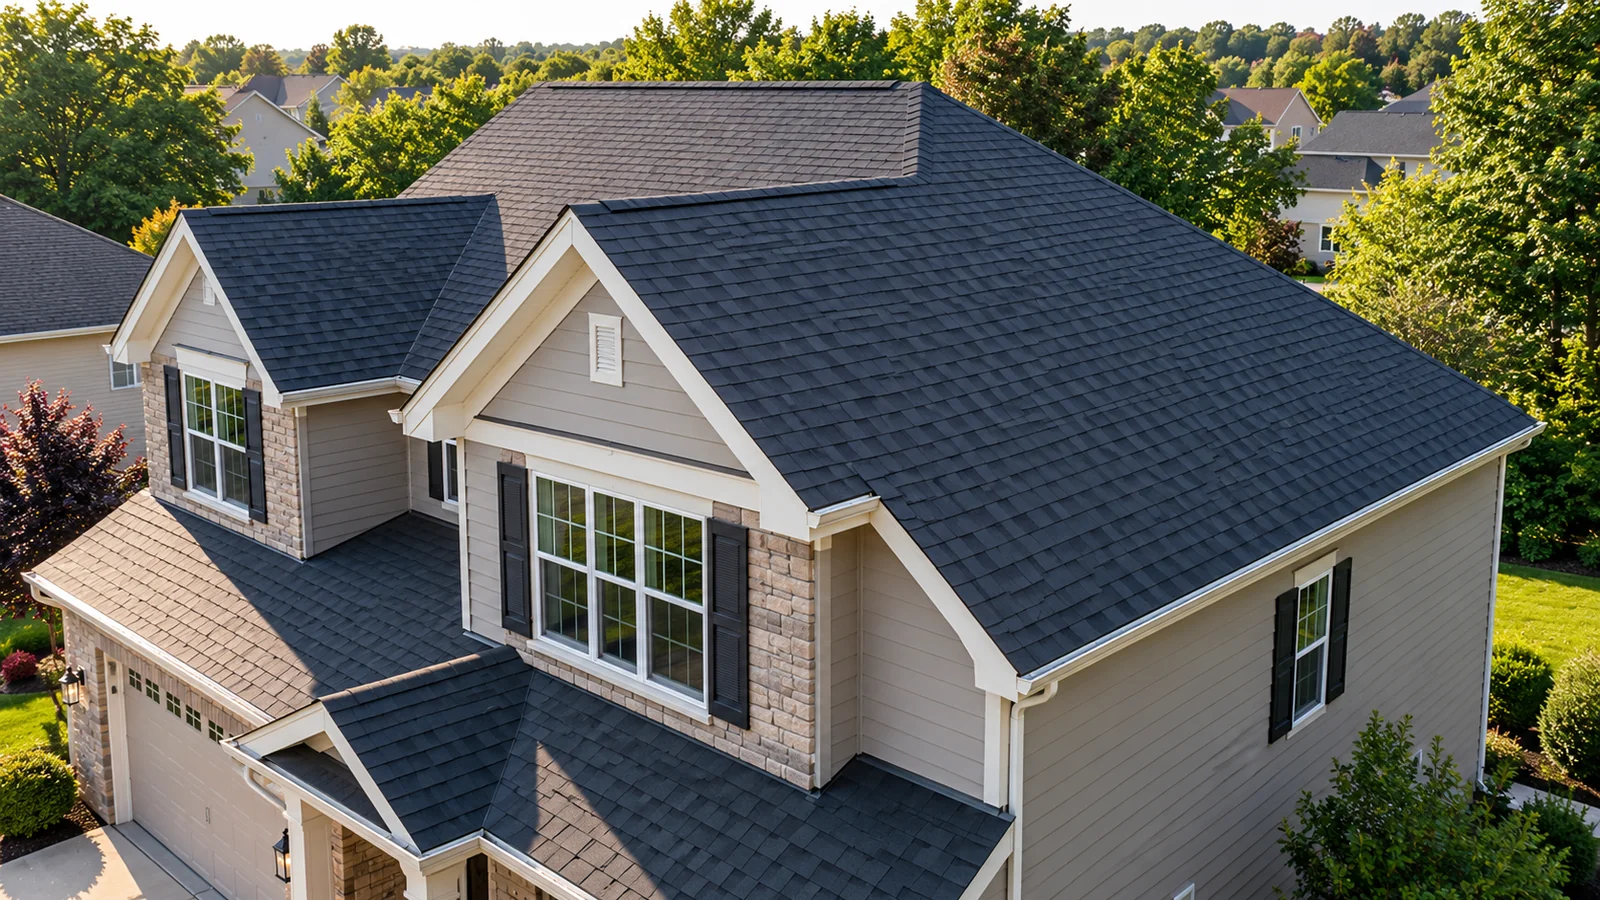
Planning a roof replacement, comparing contractor quotes, or estimating shingles? The key measurement is the actual sloped roof surface, not your house’s floor area. A roof that covers a 1,200-square-foot rectangle can contain more than 1,200 square feet of roofing once its pitch is included—and overhangs, dormers, and intersecting roof sections can add even more.
This guide shows how to calculate roof area and roof pitch using a tape measure, a building plan, or reliable measurements taken from the ground. You will learn the rise-over-run formula, a roof pitch multiplier table, worked examples in feet and meters, how to estimate roofing squares and shingle bundles, and where a simple calculation stops being reliable.
Quick formula: For a simple roof with one consistent slope, sloped roof area = horizontal roof plan area × √(1 + (rise ÷ run)²). If pitch is written as 6:12, the multiplier is √(1 + (6 ÷ 12)²) = 1.1180. Multiply the roof’s horizontal projected area—including its relevant overhangs—by 1.1180 to estimate the actual surface area. Apply a separate waste allowance only when estimating purchasable materials.
Safety first: This is a measurement and estimating guide, not instructions to climb onto a roof. Roof work and roof measurements can involve serious fall hazards. Use drawings, ground measurements, or a qualified roofing professional rather than climbing onto an unprotected roof.
Roof area vs. house square footage: understand the difference
Three areas are often confused, and using the wrong one can produce an expensive material estimate.
- Floor area is the interior or conditioned space often used in real-estate listings. Multi-story homes may have far more floor area than their roofs cover.
- Roof footprint or plan area is the roof’s horizontal projection viewed from above, normally including the eave and rake overhangs relevant to the roof planes. It is not the angled surface.
- Roof surface area is the area measured along the sloping planes where shingles, panels, or another roofing system are installed.
On a standard pitched roof, the actual surface is larger than its horizontal projection. For example, with a 6:12 slope, the multiplier is approximately 1.118—about 11.8% more surface area than the projected area. An addition with another pitch must be calculated separately, not forced into the original roof’s multiplier.
GAF’s explanation of how to measure a roofing square emphasizes measuring each roof plane and accounting for slope and architectural details rather than assuming the home’s listed square footage equals the roof area.
What roof pitch means: rise, run, angle, and slope
In everyday US residential roofing, roof pitch usually means the vertical rise for every 12 inches of horizontal run. A roof labeled 4:12 rises 4 inches as it extends 12 horizontal inches. A 9:12 roof rises 9 inches over the same horizontal distance.
In strict traditional construction terminology, slope is rise divided by horizontal run while pitch may refer to rise divided by the full span. However, contemporary residential calculators, material guides, and contractors commonly use expressions such as 6/12 pitch to mean rise over a 12-unit horizontal run. Confirm which convention a drawing uses before estimating.
The three measurements that matter
- Rise: The vertical increase between two points on the roof.
- Run: The horizontal distance between those points, not the distance measured along the sloping roof.
- Span: The entire horizontal building width across the roof; a centered, symmetrical gable roof has a run equal to half its span.
For a symmetrical gable roof with a 24-foot span and a 6-foot rise from eave level to ridge, the half-span run is 12 feet. Since 6 ÷ 12 = 0.5, the roof is 6:12, not 3:12. The rise and run must be expressed in the same units for the calculation.
Pitch as an angle: The roof angle in degrees is arctan(rise ÷ run). For 6:12, arctan(0.5) is about 26.6°. It is not 6 degrees, and a 6:12 pitch does not imply a 6% grade.
The roof area formula and why the pitch factor works
For a consistent roof plane, a right triangle describes the vertical rise, horizontal run, and diagonal roof length. Using the Pythagorean theorem, the ratio of the sloped length to the horizontal run is the pitch factor.
Pitch factor = √(run² + rise²) ÷ run For X:12 pitch: factor = √(12² + X²) ÷ 12 Sloped roof area = horizontal projected roof area × pitch factorThe factor adjusts a horizontal projected area, not an already measured slope length. Multiplying by it twice will overestimate the surface. Conversely, if you directly know a roof plane’s actual sloping length and its width along the eave or ridge, you can multiply those two measurements directly without another pitch correction.
For a simple rectangular roof whose plan area is 1,200 square feet at 6:12, the calculation is 1,200 × 1.1180 = approximately 1,342 square feet of sloped surface, before waste.
Roof pitch multiplier chart: from 2:12 to 12:12
The following factors follow the mathematical formula above. The angles and multipliers are rounded, so results may differ slightly from full-precision calculations.
| Roof pitch | Approx. angle | Pitch multiplier | Extra area vs. plan |
|---|---|---|---|
| 2:12 | 9.5° | 1.0138 | 1.4% |
| 3:12 | 14.0° | 1.0308 | 3.1% |
| 4:12 | 18.4° | 1.0541 | 5.4% |
| 5:12 | 22.6° | 1.0833 | 8.3% |
| 6:12 | 26.6° | 1.1180 | 11.8% |
| 8:12 | 33.7° | 1.2019 | 20.2% |
| 10:12 | 39.8° | 1.3017 | 30.2% |
| 12:12 | 45.0° | 1.4142 | 41.4% |
How to use the table: If the roof’s projected area is 1,500 square feet and its pitch is 8:12, the estimated sloped area is 1,500 × 1.2019 ≈ 1,803 square feet. This assumes the 1,500 square feet already describes the horizontal projection of every roof surface included in the estimate.
Step-by-step: calculate the area of a simple gable roof
A gable roof has two main sloping planes meeting at a ridge. If both planes have the same pitch and the roof outline is rectangular, it is usually straightforward to estimate its total roof area from the projected outline.
Step 1: Establish the horizontal roof outline
Start with the length and width of the roof’s projected outline, not simply the building’s walls. As a worked example, suppose the horizontal roof footprint, including the overhangs, measures 40 feet long × 30 feet wide.
Projected area = 40 × 30 = 1,200 square feet.
If all you know is the wall-to-wall building size, measure or estimate the overhangs separately. Adding 1 foot of eave overhang on each side increases the applicable roof width by 2 feet; adding a 1-foot rake overhang at each end similarly affects the roof length. Whether a dimension already includes an overhang is essential to avoid counting it twice.
Step 2: Identify the roof pitch
Suppose a plan, accessible attic measurement, or professional survey gives a pitch of 6:12. The factor is 1.1180. Confirm that both primary roof planes have that pitch and that no attached roofs have been omitted.
Step 3: Calculate actual sloped roof area
Horizontal plan area = 40 ft × 30 ft = 1,200 ft² 6:12 multiplier = √(12² + 6²) / 12 = 1.118034 Actual roof area = 1,200 × 1.118034 = 1,341.64 ft² Rounded area for discussion = 1,342 ft²Because the projected area covers both sides of the symmetrical gable, do not multiply the answer by two again. The two sloped planes together cover the entire 40-by-30-foot rectangle in plan view. Alternatively, you can measure and calculate each plane separately and add the results.
Step 4: Convert the result into roofing squares
One roofing square equals 100 square feet of roof surface. The roof in this example contains 1,341.64 ÷ 100 = 13.42 roofing squares, before trimming and waste. Roofing squares are an estimating unit, not a package size.
Step 5: Apply material allowance separately
If a provisional 10% waste and trimming allowance is appropriate for the chosen covering and roof complexity, a planning quantity is 1,341.64 × 1.10 = 1,475.80 square feet, or 14.76 roofing squares of material coverage. The original roof does not suddenly become larger; this is an ordering allowance to cover cuts and losses.
For standard asphalt shingles packaged at three bundles per roofing square, that corresponds to 14.76 × 3 = 44.28 bundles, so at least 45 whole bundles would be needed under this simplified coverage assumption. Actual bundle coverage varies by product; verify the package label and the manufacturer’s installation requirements before ordering. GAF describes both roofing squares and common bundle quantities.
How to measure roof pitch without unsafe roof access
You may be able to determine roof pitch without standing on a roof. Prioritize official plans, a reliable roof measurement report, or measurements from an accessible unfinished attic where the underside of a rafter is clearly visible. If the space is not safely accessible, use a qualified professional.
- Locate a clearly horizontal reference line and measure 12 inches of horizontal run. A level, square, or reliable plan drawing can help establish horizontal distance; do not mistake sloped rafter length for run.
- Measure the corresponding vertical rise between the reference line and the roof slope. For instance, a 5-inch rise over 12 horizontal inches indicates a 5:12 slope.
- Repeat at another accessible location if the roof may have multiple planes or pitches. Document which plane each measurement represents.
- Convert the rise and run to consistent units. On plans, 0.4 metres of rise over 1.2 metres of run becomes a rise/run ratio of 1/3, equivalent to 4:12.
- If you only know the slope’s angle, use rise per 12 = 12 × tan(angle), with the angle entered in the correct degree mode.
A smartphone inclinometer can provide a rough estimate against a properly oriented surface, but inaccurate placement and device calibration can mislead. Never lean over an eave or access an unsafe attic just to obtain a DIY measurement. The OSHA residential fall-protection guidance illustrates why roof access is a serious professional safety issue.
The overhang problem: what dimensions should you enter?
One of the biggest sources of underestimation is measuring exterior walls but forgetting that the roof extends beyond them.
Consider a rectangular building with a 38-foot wall length and a 28-foot wall width. Assume, purely for illustration, a 1-foot rake overhang at each end and a 1-foot eave overhang along both sides. The horizontal roof outline then becomes (38 + 2) × (28 + 2) = 40 × 30 = 1,200 square feet.
At 6:12, the sloped area is about 1,342 square feet. By contrast, using only the wall dimensions gives 38 × 28 × 1.118 ≈ 1,190 square feet—an underestimate of roughly 152 square feet, even before material waste. Real homes may have different overhang lengths, returns, dormers, and irregular corners; measure the actual projected outline instead of adding a generic allowance indiscriminately.
Important: Enter eave and rake overhang measurements in the way your chosen calculator requests them. Some tools ask for overall roof dimensions; others ask for building dimensions and an additional overhang input. Do not include the same overhang twice.
Complex roofs: hips, valleys, dormers, and attached additions
A roof with multiple intersecting planes cannot always be represented as a single rectangle and one pitch factor. The reliable approach is to divide the roof into separate, non-overlapping projected sections and calculate each section using its own slope.
Divide the plan into roof sections
- Start with an overhead plan or a contractor’s roof sketch. Outline each area once, ensuring the projected sections do not overlap.
- Label the pitch for each plane or group of planes. A porch roof may have a different slope from the main house.
- Use a rectangle formula (length × width) for rectangular projections.
- Use a triangle formula (base × perpendicular height ÷ 2) for triangular projections, making sure the height is measured in the same plan plane.
- For a trapezoid projection, use (parallel side A + parallel side B) ÷ 2 × perpendicular height.
- Multiply each projected section by the corresponding pitch factor and then sum the roof-surface areas.
For a conventional hip roof with a uniform pitch, the entire non-overlapping horizontal roof projection × one consistent pitch factor remains a useful way to estimate total surface area. The hips and valleys themselves usually do not create an extra area to be added on top: they are edges where planes meet. What changes is the difficulty and quantity of cutting, the length of flashings and ridge/hip components, and the waste allowance.
For dormers and intersecting gables, be careful not to count the hidden roof beneath an upper plane as exposed roofing. A reliable measured plan should distinguish the actual finished surfaces.
Worked example: a roof with two different pitches
Suppose an L-shaped house can be partitioned into two non-overlapping horizontal roof projections: a 900-square-foot main section at 5:12 and a 450-square-foot addition at 8:12.
| Roof section | Plan area | Pitch factor | Sloped surface |
|---|---|---|---|
| Main roof | 900 ft² | 1.0833 (5:12) | 975.0 ft² |
| Addition | 450 ft² | 1.2019 (8:12) | 540.8 ft² |
| Combined roof | 1,350 ft² | Use each pitch separately | 1,515.8 ft² |
The measured surface is approximately 1,516 square feet, or 15.16 roofing squares. A hypothetical 12% material allowance produces 1,515.83 × 1.12 = 1,697.73 square feet, or 16.98 squares for ordering calculations. If the specific shingles provide exactly three bundles per 100 square feet, round 16.98 × 3 = 50.93 up to 51 bundles. That is an illustrative estimate, not a project specification or purchase order.
Roof area calculation in meters and square meters
The same geometry works in the UK, Europe, and anywhere using metric measurements. The ratio of rise to run is dimensionless, so a roof with a vertical rise of 0.5 metres over 1.0 metre of run is equivalent to 6:12. Convert lengths to metres before calculating area in square metres.
Example: A rectangular roof has a projected length of 12 m and width of 9 m, including overhangs, with a rise/run ratio of 0.5. Its plan area is 12 × 9 = 108 m². The pitch factor is √1.25 = 1.1180, and the sloped area is 108 × 1.1180 = 120.75 m².
If the covering requires a provisional 10% material allowance, the planned coverage becomes 120.75 × 1.10 = 132.82 m². For tiles, standing-seam roofing, or sheet products, order by the manufacturer’s stated installed effective coverage, not only by the item’s nominal physical dimensions.
Convert between square feet and square meters
| Unit conversion | Calculation |
|---|---|
| Square feet to square meters | ft² × 0.09290304 |
| Square meters to square feet | m² × 10.7639104 |
| Roofing squares to square feet | Squares × 100 |
| Square feet to roofing squares | ft² ÷ 100 |
A roofing square is the US unit of 100 square feet, or approximately 9.2903 m². It is not one square metre or one 10-square-metre package.
Estimating shingles, tiles, underlayment, and metal roofing
Roof area is the foundation of a materials estimate, but it is not enough to produce a full bill of materials. Product coverage, headlap, side overlap, fastener spacing, climate requirements, and the roof’s geometry all affect quantities.
Asphalt shingles: use the labeled bundle coverage
- Calculate the actual roof surface in square feet.
- Apply an allowance that reflects complexity and the product manufacturer’s guidance; do not treat any percentage as universal.
- Divide the adjusted coverage area by the square-foot coverage of one bundle as printed on the product label or technical sheet.
- Round up to whole bundles and confirm ridge caps, starter strips, and special shingles separately.
For many standard US asphalt shingle products, three bundles cover about one roofing square. However, three bundles per square is not a guarantee for every shingle. Heavy products, specialty materials, and different packaging may vary, as GAF explains in its bundle coverage guide.
Metal sheets: calculate useful coverage, not just raw width
Metal roofing systems often specify a nominal panel width and a smaller effective cover width after seam engagement or side laps. As a hypothetical example, a 1.00-metre-wide sheet with 0.90 metres of installed cover width provides only 0.90 metres of covered width per sheet. Actual sheet lengths, end laps, ridge/eave details, and offcuts then determine the number to order.
This is why dividing total roof area by the nominal area of an individual panel can understate the required quantity. For standing seam or profiled systems, use the manufacturer-approved panel layout and allowable lengths. Wind uplift, penetrations, and fasteners must be designed to local requirements.
Tiles and slates: manufacturer coverage comes first
Tile and slate coverage depends on installed gauge, overlap, headlap, and roof pitch, not merely the face dimensions of the tile. Multiply roof area by the stated units per square metre or units per square foot for the required installed overlap. Add suitable allowance for cuts and breakage based on the layout and product recommendations.
Components that need their own quantities
- Underlayment: area plus required laps, additional layers, and special low-slope detailing.
- Ice and water protection or leak barriers: lengths and locations of eaves, valleys, and penetrations, based on climate, codes, and system specifications.
- Ridge and hip caps: measured linear lengths—not just roof area.
- Starter strips, drip edge, and flashing: measured eave, rake, wall-intersection, chimney, and penetration lengths.
- Ventilation: calculated according to the chosen roof assembly, attic requirements, and applicable codes; it is not determined from square feet of shingles alone.
How much waste should be added to a roof estimate?
Some manufacturer estimating articles use approximately 10–15% as a common planning range for trimming and waste, but no single percentage fits every roof or covering. A simple gable can need less waste than a roof full of valleys, short planes, dormers, and diagonal cuts. Tile breakage and metal panel offcuts have different dynamics from asphalt-shingle waste.
It is helpful to separate three numbers in a written estimate: net measured roof area, planned material allowance, and rounded purchasable quantity. Do not quietly increase the roof’s measured area when you mean extra bundles or panels.
A calculation with 1,500 square feet of actual surface and 10% allowance means 1,650 square feet of purchase coverage, not a 1,650-square-foot roof. Also, adding a percentage to area does not automatically provide the right amount of flashing, ridge caps, fasteners, or other linear and specialized components.
GAF’s 2026 guidance on shingle bundles and roof squares describes a 10–15% waste and trimming allowance as a typical contractor consideration and notes that steep or complex details can increase requirements.
Pitch also determines whether a roofing product is suitable
A roof with a small angle may have an area multiplier close to 1.000, but that does not mean a standard pitched-roof shingle system is suitable. The roof’s slope affects how quickly water drains and which underlayment, membrane, and covering systems can be used.
According to the Asphalt Roofing Manufacturers Association’s lower-slope guidance, asphalt shingles may be installed from 2:12 to less than 4:12 only with special procedures; asphalt shingles should not be applied below 2:12. The specific manufacturer, roof system, local code, and environment may impose additional restrictions. Do not use a roof area calculator as a substitute for checking the covering’s minimum approved slope.
A 2:12 roof and a 12:12 roof also pose very different access and installation challenges. Roof measurements and material ordering should be separated from decisions about structural loads, waterproofing design, construction permits, and fall-protection procedures.
Common mistakes that change the result
| Mistake | Why it matters | Better approach |
|---|---|---|
| Using home floor area | Floor area may include several stories and excludes roof-specific features | Measure horizontal roof projections |
| Ignoring overhangs | The covered outline extends beyond the walls | Include eave/rake dimensions once |
| Applying the multiplier twice | Already-sloped measurements are increased again | Multiply only projected area by pitch factor |
| Doubling a whole gable footprint | The footprint already includes both roof planes | Double only a single-plane estimate when appropriate |
| Using one pitch for an entire mixed roof | Attached roofs may use different slopes | Split into non-overlapping sections |
| Treating 6:12 as six degrees | Roof angle and rise/run are different measures | Use arctan(6/12) = 26.6° |
| Buying to net area only | Cuts, overlaps, breakage, and rounded packs add demand | Apply product-specific material allowances |
| Counting covered or hidden areas | Intersections can cause overlapping estimates | Count only exposed finish surfaces |
How to compare roofing quotes using your calculation
A homeowner’s estimate is most useful as a reasonableness check, not as proof a contractor’s takeoff is wrong. Ask each roofer to identify the measured area, slope, number of squares, material product and coverage, material allowance, tear-off work, flashing, ventilation, deck repair contingencies, and labor. A roof quote can legitimately be higher than another even when both roof-area measurements agree because different roof systems and scopes are being priced.
Compare like with like. For example, a quote for 18 roofing squares may mean 1,800 square feet of measured roof, or it may be a rounded purchasing quantity including waste. Get that distinction in writing. If a bid differs by hundreds of square feet, ask for the roof sketch or measurement report before treating either number as correct.
Use at least two reputable local contractor assessments for a major roof project, especially when the home has multiple pitches, dormers, damage, or difficult access. An on-site inspection can discover hidden problems that no area formula detects.
Use the Horus Valley Roofing Calculator
You can quickly estimate sloped area using the free Horus Valley Roofing Calculator. It is designed to calculate roof area and covering estimates from building dimensions, pitch, and overhang inputs.
- Choose the gable or shed roof type shown by the calculator. The tool is intended for those simple roof forms, not a full automatic takeoff of a complicated hip-and-valley roof.
- Enter building length and width in metres and the overhang in metres. Do not add the overhang into the dimensions a second time.
- Enter pitch angle in degrees. The calculator asks for degrees, not a 6:12 fraction: convert 6:12 to about 26.6° before entering it.
- Enter the covering’s effective sheet coverage in m² if you want an approximate sheet count, then calculate and review the sloped area.
- Use the result as a planning estimate and confirm the roof layout, product coverage, and installation requirements with a professional.
For irregular roof geometry, calculate separate sections and combine verified areas. The calculator is a useful starting point, not a structural design report, an aerial survey, or a substitute for professional installation planning.
A final checklist before ordering roofing materials
- Confirm whether measurements describe horizontal projections or already-sloped surfaces.
- Identify each roof plane and its rise/run ratio; confirm units.
- Include roof overhangs, dormers, and exposed porch or garage sections exactly once.
- Check the pitch factor against the formula or chart.
- Record the net roof surface area before adding allowances.
- Convert to roofing squares if your material supplier prices in US squares.
- Confirm effective product coverage, trimming losses, and whole-pack rounding.
- Estimate linear components separately and review low-slope and local-code restrictions.
- Have a qualified installer verify complex geometry, roof condition, and safe access.
Bottom line: The most dependable basic method is projected area × pitch multiplier, calculated separately wherever the roof slope changes. When you keep measured surface area distinct from waste and ordering quantities, you can compare estimates more confidently and reduce avoidable material shortages or unnecessary purchases.
Sources and technical references
- GAF — How to Measure a Roofing Square: roof planes, squares, pitch, and measuring limitations.
- GAF — How Many Bundles of Shingles Are in a Square? (August 2026): typical bundle coverage, waste, and purchasing considerations.
- GAF — Minimum Slope for Shingles: suitability of asphalt shingles on low-slope roofs.
- Asphalt Roofing Manufacturers Association — Installation on Lower Sloped Roofs: technical conditions for 2:12 up to 4:12 roof slopes.
- OSHA — Fall Protection in Residential Construction: professional fall-hazard requirements and guidance.
Editorial note: Figures are illustrative mathematical estimates, not site measurements or material quotations. Manufacturer instructions, local codes, applicable standards, and professional assessments take precedence over general estimating examples.
You may also like
 Technology & How-To
USB Works on PC but Not on TV? How to Find the Cause
Diagnose a USB drive that works on a computer but not a TV. Separate detection, missing files and…
 Technology & How-To
WhatsApp “Waiting for This Message”: Fixes for iPhone, Android and Web
Fix WhatsApp’s waiting-message notice by comparing your phone and linked devices, checking updates and protecting existing chat data.
 Technology & How-To
WhatsApp iOS 15.5 Requirement: What Changes on November 30, 2026?
WhatsApp raises its iPhone minimum to iOS 15.5 on November 30, 2026. Check your version, older iPhone eligibility…