
Free AI Background Remover Online: How to Use Horus Valley
A practical guide to Horus Valley’s free image background remover: choose a photo, remove its background, download a transparent result and check the edges.
Contents
- Open the free tool and prepare the right photo
- How to remove the background step by step
- Step 1: Choose the original image
- Step 2: Start background removal and let the model finish
- Step 3: Inspect the finished subject, not only the progress message
- Step 4: Download the image and test transparency
- Using the free remover on Android and iPhone
- Use cases: product listings, portraits and designs
- Product photography for small businesses
- Profile pictures and marketing graphics
- Transparent assets for websites and presentations
- Five checks that improve cutout quality
- Troubleshooting: when background removal goes wrong
- How to tell whether your saved PNG is really transparent
- What “free” means—and what we do not assume
- Quick decision guide: should you retry or edit manually?
- Change the background and refine the cutout
- Privacy: what the live page states
- Try the free Horus Valley background remover
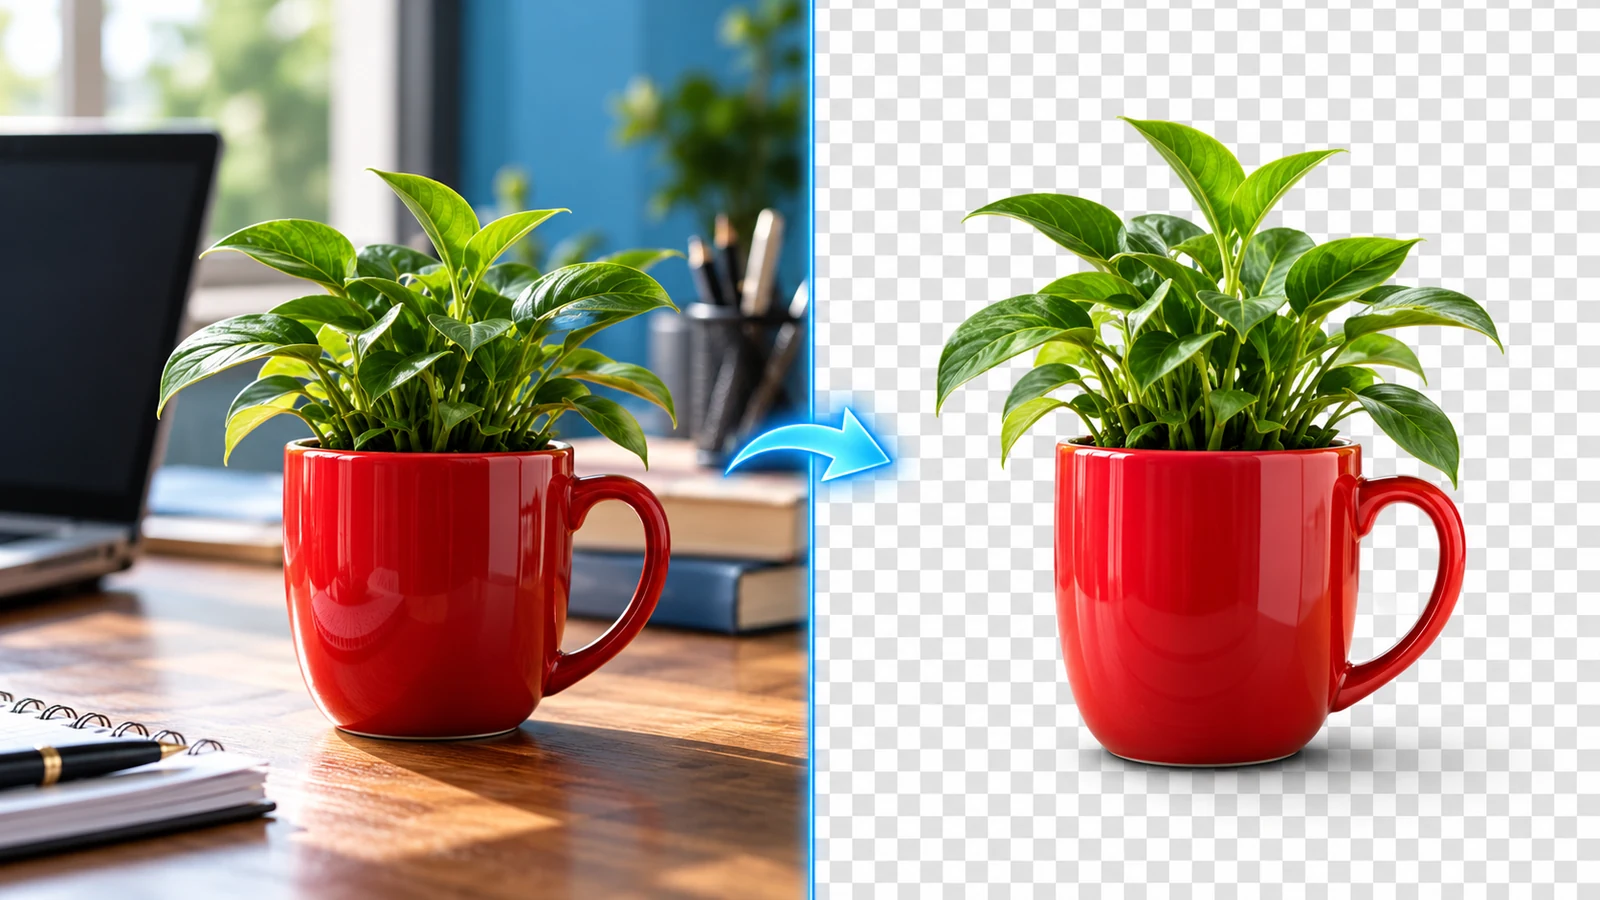
Horus Valley’s background remover is free to use, with no signup required in our live test. Open the free Background Remover, choose a JPG, PNG or WebP image, select Remove background, review the processed preview and download your result. We completed a desktop test without a payment or account prompt. This guide includes real screenshots from that test.
The most important difference from a generic “one-click” promise is quality control. A good cutout should preserve the part of the photo you actually need, including product handles, hair and small details, while removing unwanted surroundings. You can check this in under a minute before publishing a design.
Open the free tool and prepare the right photo
Open the free tool using the link above. The current interface offers image selection, AI removal, background choices, edge controls and original-size or preview downloads. Keep a copy of the source photo and use a modern browser.
- Choose a clear photo where the main subject is visibly separated from the backdrop. For a shop product, keep the entire object inside the frame; for a portrait, avoid cutting off hair, ears or shoulders.
- Keep an untouched original. If your photo is already small or blurry, do not assume the remover can invent the missing detail.
- Prefer a common input image such as a JPG or PNG when available. If the tool rejects your file, try exporting a new JPG or PNG copy before repeating the process.
- For a privacy-sensitive photo, review the tool page’s current privacy information before using it. The existence of browser-based AI technology alone does not prove how a specific deployment handles files.
How to remove the background step by step
Step 1: Choose the original image
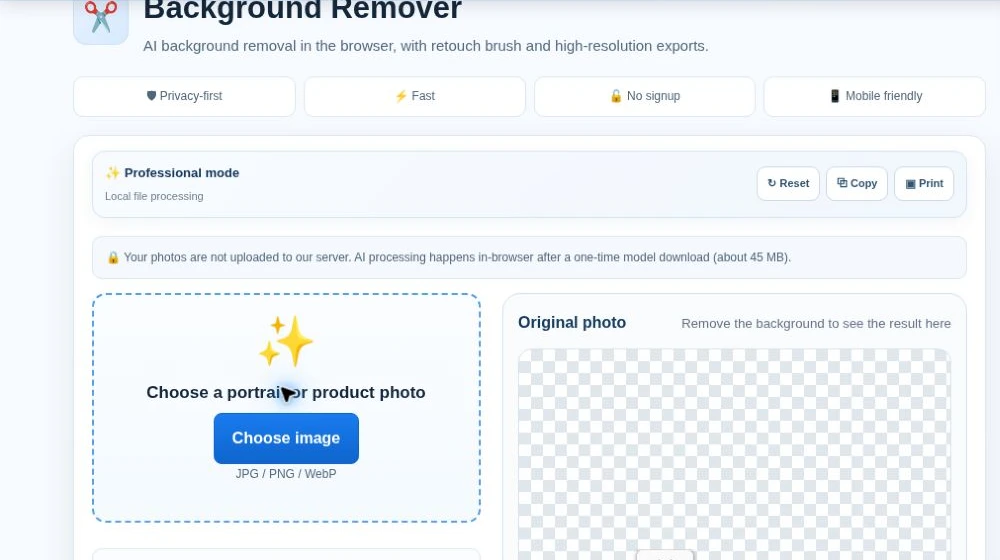
Click Choose image and select a JPG, PNG or WebP photo. The page displays its filename and dimensions. In our test the selected illustration measured 1672 × 941 pixels. Use an image with one clearly identifiable main subject when possible.
Step 2: Start background removal and let the model finish
Click Remove background. The page says it loads ISNet on demand and performs processing in the browser; it describes the first model download as about 45 MB. Keep the tab open during preparation and processing. This is not a promise of a fixed processing time or offline availability.
Step 3: Inspect the finished subject, not only the progress message
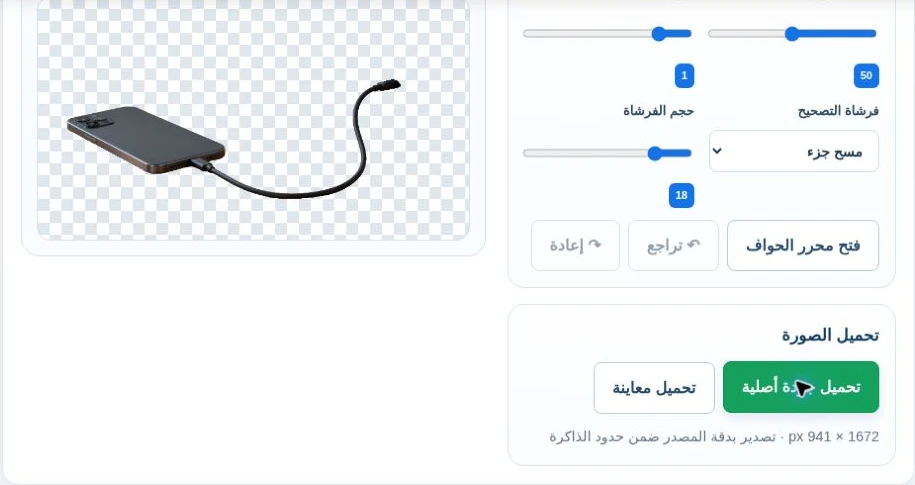
Wait for AI background removal completed and inspect the preview labeled Background removed. Our test isolated the phone and cable but also removed the charger. That may be useful if the phone is your intended subject, but unsuitable if you wanted the entire charging setup. A completion message does not establish a perfect mask.
Keep the original for comparison. The screenshots show the actual processed preview from a synthetic illustrative photo, not a fabricated before-and-after. The observed quality applies to this example, not every portrait or product.
Step 4: Download the image and test transparency
Choose Transparent PNG for a transparent background, then use Download original size or Download preview. The live interface reported 1672 × 941 pixels and source-resolution export subject to memory limits. We activated the original-size download; independent pixel/alpha inspection of the downloaded file was not completed, so verify your saved output as described below.
MDN’s image-format reference confirms that PNG supports alpha transparency while standard JPEG does not. WebP can also contain transparency, but saving a cutout as JPG normally replaces transparency with a solid color in the exported result.
Using the free remover on Android and iPhone
- Open the Horus Valley tool in Chrome, Safari or another up-to-date browser.
- Tap the image picker and select a photo from the gallery, Files app or photo library. Your browser may ask for permission.
- Leave the page open until the processed preview appears, then inspect edges by zooming or opening the image separately.
- Save the processed file, then use Files or Downloads to find the actual PNG. On iPhone, the resulting file may first go to the Files app rather than the Photos library, depending on how you save it.
- To use it for a social post, import the transparent image as a separate layer in your design app. Check it on both dark and light backgrounds.
If the phone reloads the page while processing, close memory-heavy tabs and try a smaller copy of the original image. This is a practical workaround for constrained devices, not a claim that all phones have the same limits.
Use cases: product listings, portraits and designs
Product photography for small businesses
Photograph a product in even light, with enough breathing room around the entire object. After background removal, place the cutout over a neutral product card and maintain realistic scale. For example, a phone case should retain its camera opening and all four corners; a bottle should keep its cap and handle. A cutout that looks good at thumbnail size may still be poor at close zoom.
Profile pictures and marketing graphics
For profile photos, begin with a sharp image where the face and hair are in focus. After removing the background, use a color that contrasts with the subject. Avoid pretending that automated isolation is a replacement for passport or official ID photo requirements; those may regulate editing and backgrounds independently.
Transparent assets for websites and presentations
Transparent images can sit on cards, slides and web pages without bringing along the original wall or room. Keep the high-quality cutout as a master PNG, then export a smaller web-friendly derivative only after checking its appearance. A transparent PNG is flexible, but it may be larger than an equivalent opaque JPEG.
Five checks that improve cutout quality
- Contrast: do not photograph black hair against a nearly black wall if a lighter background is available.
- Lighting: use soft, even lighting; strong reflections and motion blur confuse edges.
- Framing: leave space around shoes, hair, wheels and handles to avoid pre-cut edges.
- Edge test: check the result on white and very dark backgrounds; pale halos show on dark, black halos on white.
- Output test: open the saved PNG in a second application and confirm it behaves as a transparent layer.
Troubleshooting: when background removal goes wrong
| What you notice | Likely cause to investigate | Practical next check |
|---|---|---|
| The tool appears stuck | Initial model/resource loading, browser limits, network interruption | Keep tab open briefly; then reload, update browser, try a smaller copy |
| Preview shows the old image | Preview not updated or process incomplete | Check for completed status; inspect the downloaded file rather than trusting the preview |
| Parts of hair or product disappear | Low contrast or uncertain foreground/background boundary | Choose a better-lit photo with stronger separation; retouch in an editor if needed |
| White/black background after saving | Opaque export format or compositing in another app | Use a transparent PNG option; open in an editor with a transparency grid |
| Image has jagged or colored halos | Source compression, blur or incomplete masking | Try the original higher-quality photo and examine edges on contrasting backgrounds |
| Phone closes/reloads the tab | Memory or processing constraints | Try a smaller image, a current browser or a desktop device |
Adobe’s official background-removal instructions caution that automatic isolation can remove fine details or low-contrast areas. If the browser uses GPU acceleration, Chrome’s WebGPU troubleshooting documentation explains why hardware/browser support can affect a web application; this does not establish which accelerator the Horus Valley tool is using.
How to tell whether your saved PNG is really transparent
- Open the downloaded image in a photo editor, presentation slide or design tool.
- Put a bright blue rectangle behind the image. If you can see the blue around the subject, the surrounding pixels may be transparent.
- Repeat with a black rectangle to reveal pale fringes around the cutout.
- If you see the original wall, a white box or a printed gray checkerboard in both tests, the export is not a clean transparent cutout.
- Keep the original and exported versions separately so you can compare the actual edges.
An image that looks transparent on the tool page is not enough. Testing the downloaded asset is especially important before you put product photos into an online shop or a paid marketing campaign.
What “free” means—and what we do not assume
Yes—the tool is free, and our tested removal and original-size download flow did not require signup, payment or paid credits. Free does not mean unlimited device memory or instant processing. We tested one image, not a daily quota, batch processing or every browser. The site displays ads; the tool’s file-selection and download controls are separate from advertising links.
A realistic expectation is simple: automatic background removal saves routine manual cutting, but difficult images may still need a second attempt or a finishing edit. Your results depend on the image quality and the subject.
Quick decision guide: should you retry or edit manually?
- If the subject is mostly intact and there is only a small fringe: inspect on dark/light backgrounds, then use a trusted editor for local touch-up if needed.
- If a handle, sleeve, wheel or hairline is missing: start with a clearer original; repeated runs of the same low-quality file may reproduce the same result.
- If the output becomes solid white after another app imports it: confirm the original downloaded PNG is transparent before blaming the remover.
- If the picture is for IDs, passports or legal records: verify the destination’s exact photo rules before any editing.
Change the background and refine the cutout
The Background type menu offers Transparent PNG, White, Custom color and Gradient. Choose transparency for compositing, or white for a product card. Background replacement does not restore an object the model removed.
Edge refinement includes Cut-out level and Feather. Start with small changes and compare details. Open edge editor exposes an Erase/Restore brush, brush size and undo/redo controls. These controls were observed, but we did not benchmark their effects or perform a manual retouch test.
Privacy: what the live page states
The page states that photos are read and processed locally and are not uploaded to Horus Valley servers. This describes the published design; our session was not a network-traffic or security audit. Internet access can still be needed for the page and initial model resources.
Try the free Horus Valley background remover
Open the free online background remover, try it on a clear product or portrait photo, and check the downloaded result on a contrasting background. The practical goal is not just one click; it is a usable, genuinely transparent image that keeps the subject looking natural.
You may also like
 Technology & How-To
Is Tesla Discontinuing the Cybertruck? What We Know
Tesla plans a Cybertruck production wind-down in Texas around mid-2027. See what is confirmed, what remains unknown, and…
 Technology & How-To
Are AI Toys Safe for Kids? Privacy Risks and Parent Checks
Are AI toys safe for kids? Explore the evidence, privacy risks, age advice and practical parent checks for…
 Technology & How-To
iPhone Trust This Computer Not Showing? Windows and Mac Fixes
Restore the iPhone computer-trust prompt with checks for unlocking, Apple Devices or Finder, USB data cables and targeted…